Data providers and government agencies often offer digital elevation models (DEMs) as rasters. Many raster DEMs are available without charge and can be downloaded from the web. For example, the USGS distributes its DEM products, which are based on USGS Digital Orthophoto Quads and Quarter Quads (DOQs, DOQQs), from their website.
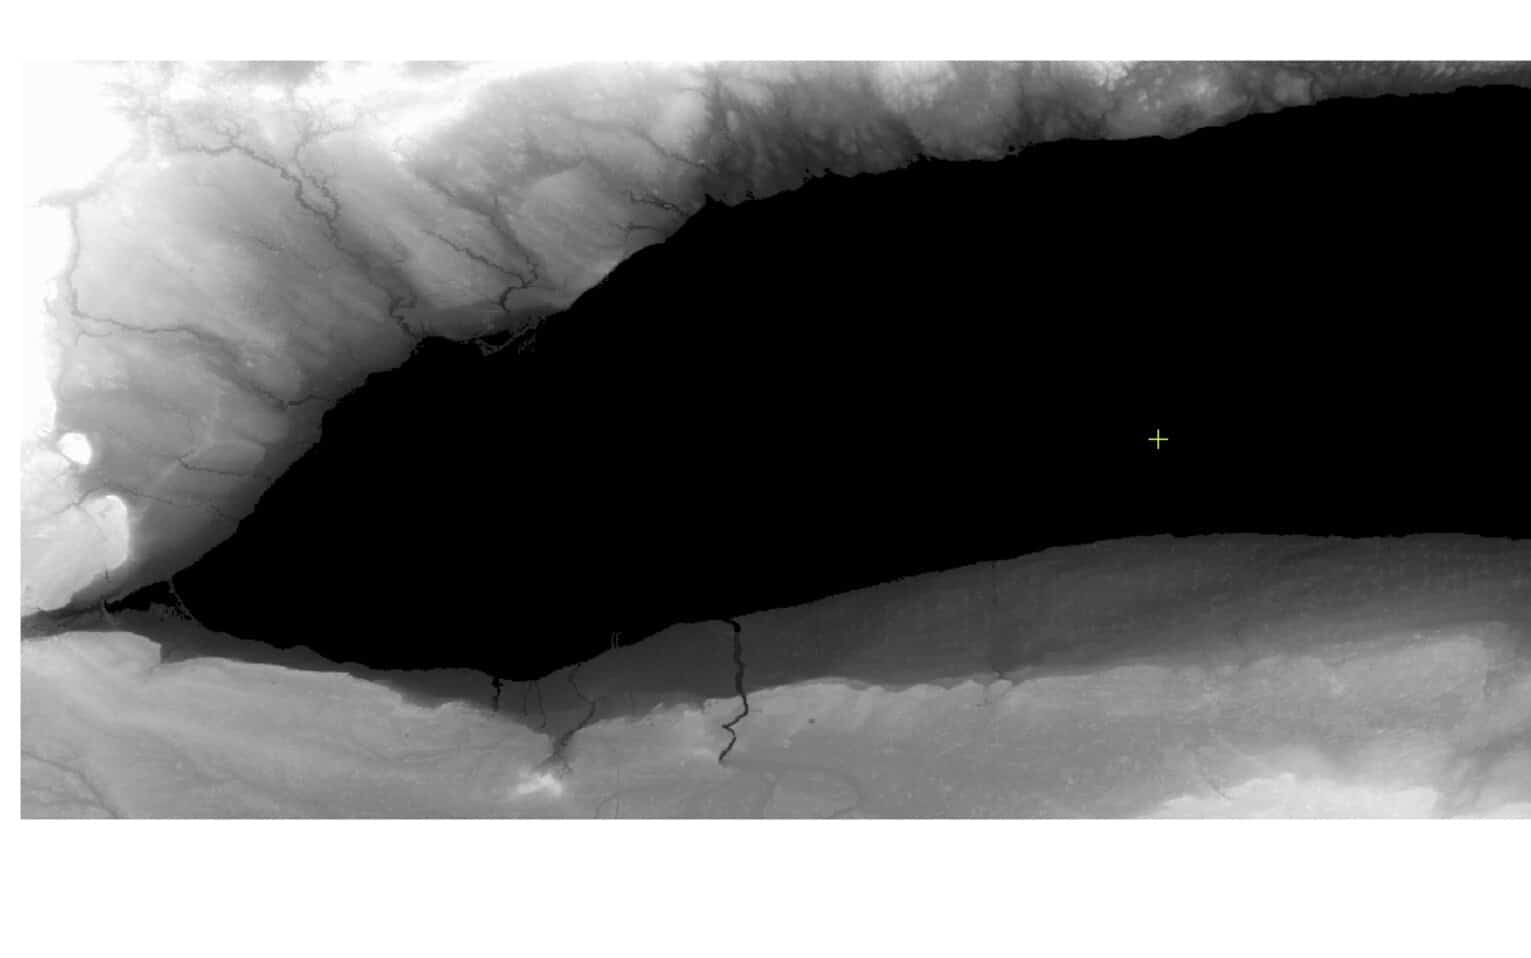
Since you may not find one raster DEM that meets your requirements, Orthoengine allows you to merge several existing DEM raster files to generate a single seamless DEM to cover your project area.
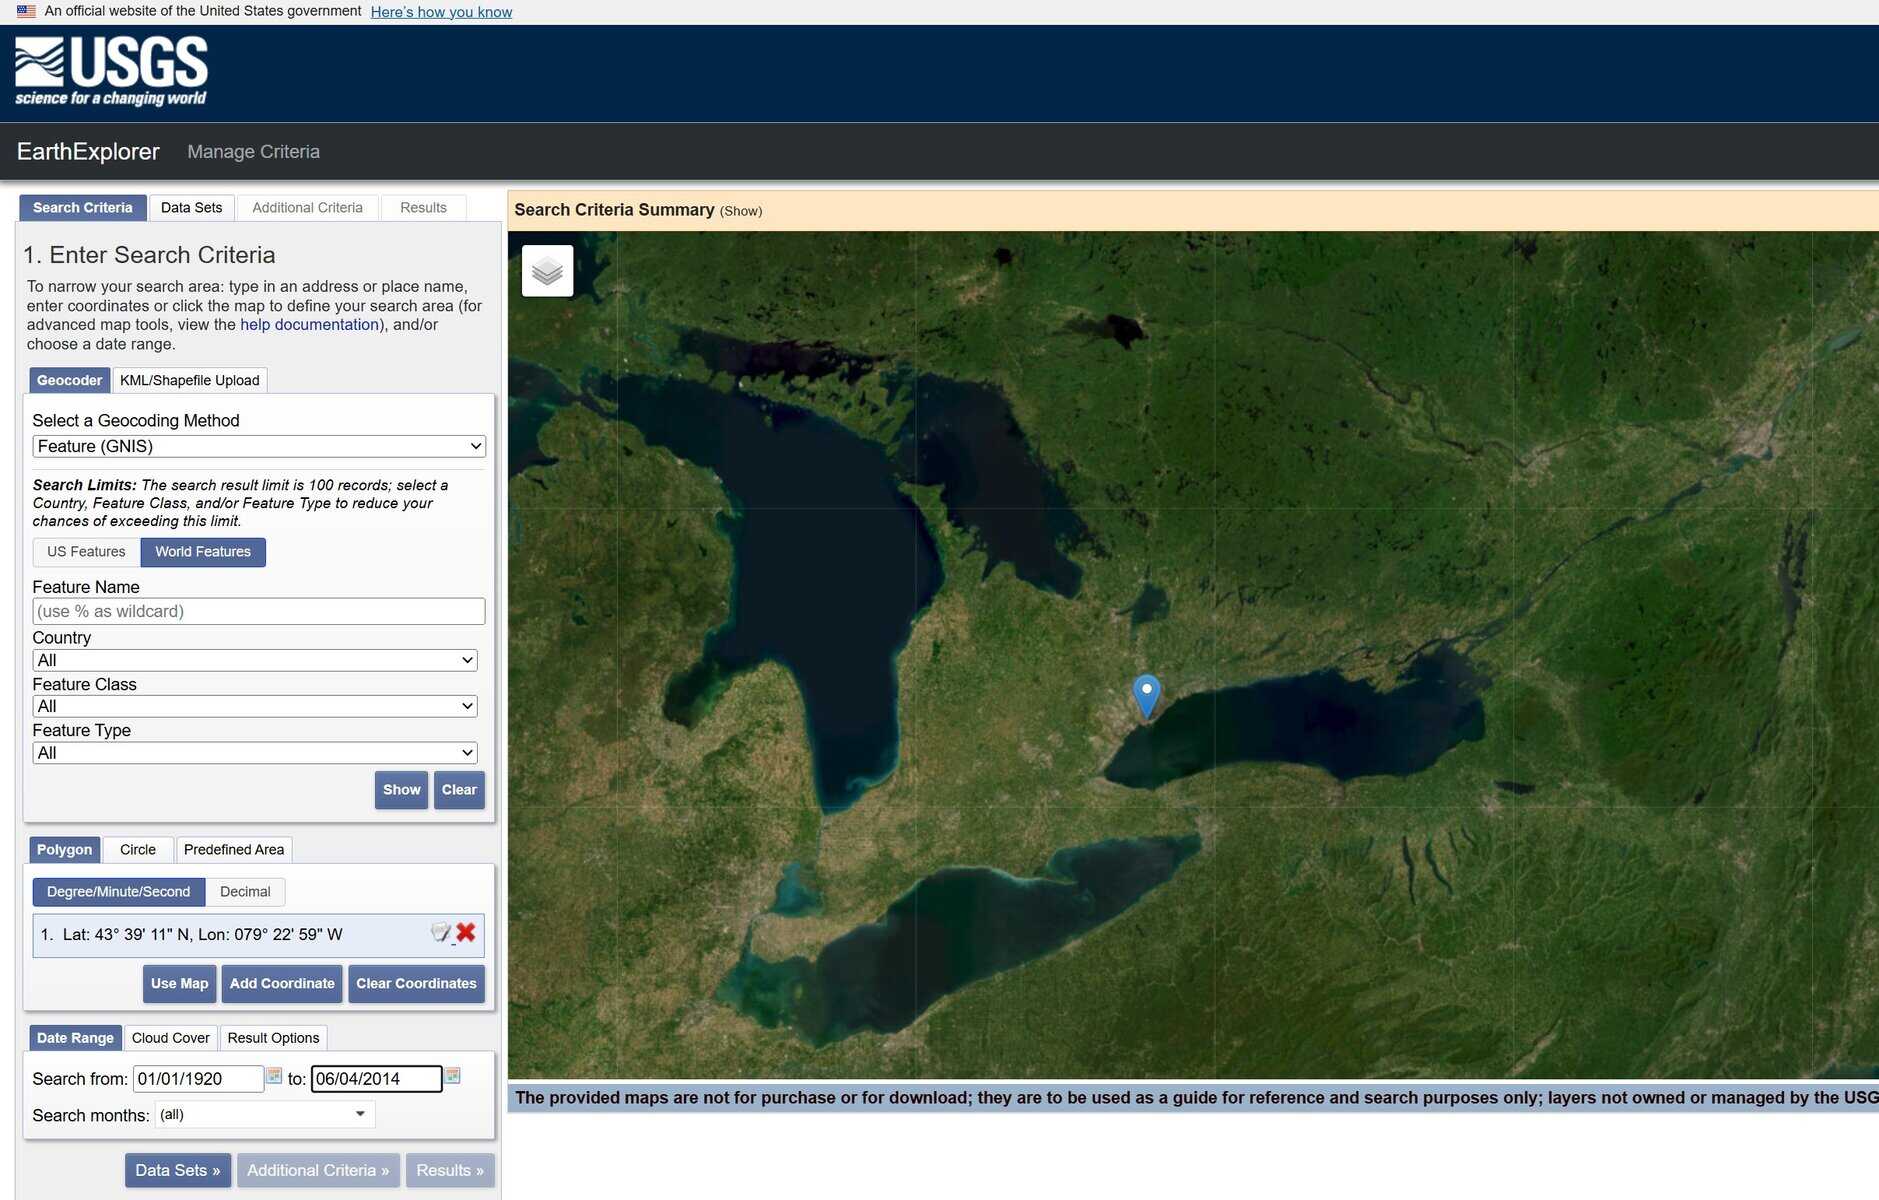
This tutorial is a guide to building DEMs from raster data and uses STRM data found online on the USGS Earth Explorer website
1. Data Download
- Log in to your USGS account or register as a new user.
- Enter a search location in the Search Criteria tab.
- Click on the Data Sets tab.
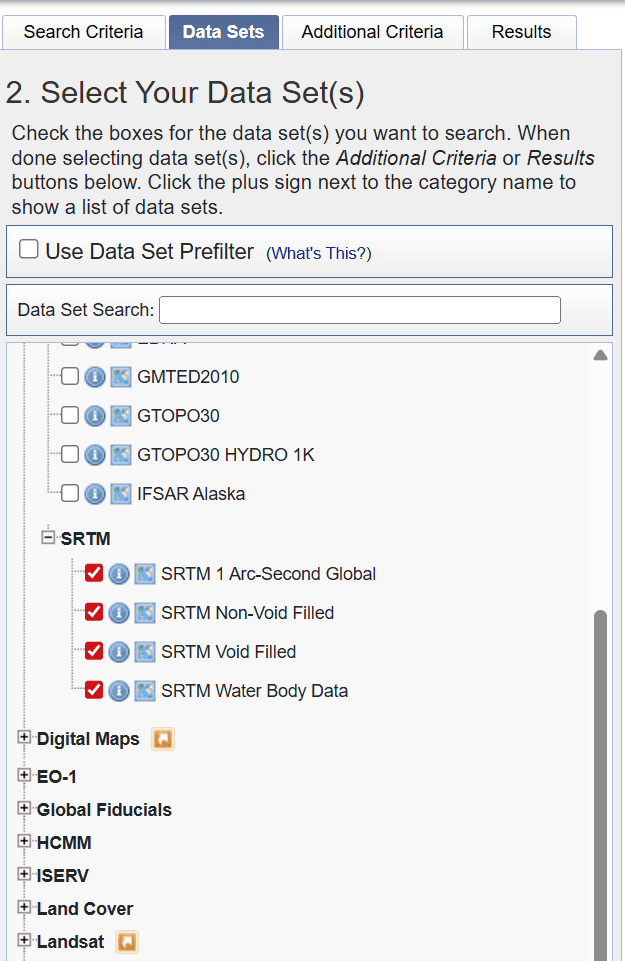
- Select Digital Elevation > SRTM.
- Select the SRTM data you would like.
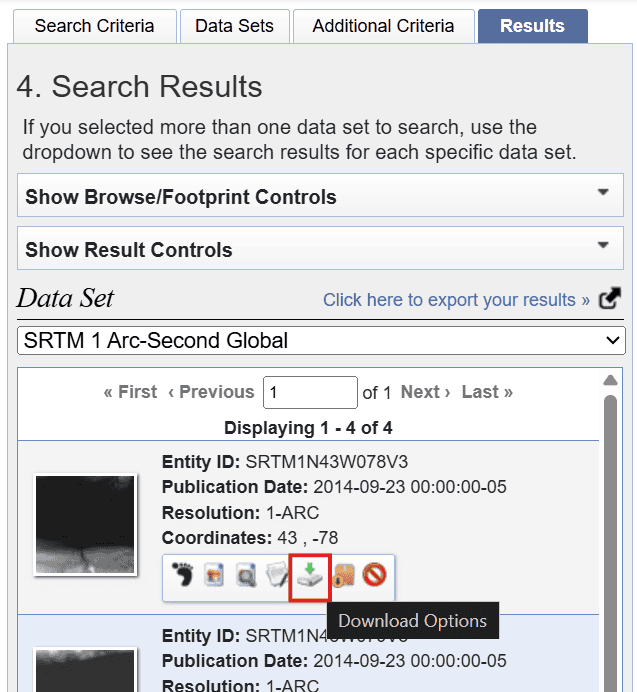
- Click Results.
- Choose which scene you would like and click the Download Options button.
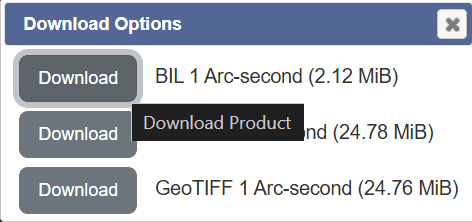
- Click the Download button of the format you want to download the data in.
- Repeat Steps 2 to 8 to download as many scenes as required to cover your study area.
2. Project Setup
- Open OrthoEngine from the CATALYST Professional toolbar.
- Create a new project: File > New.
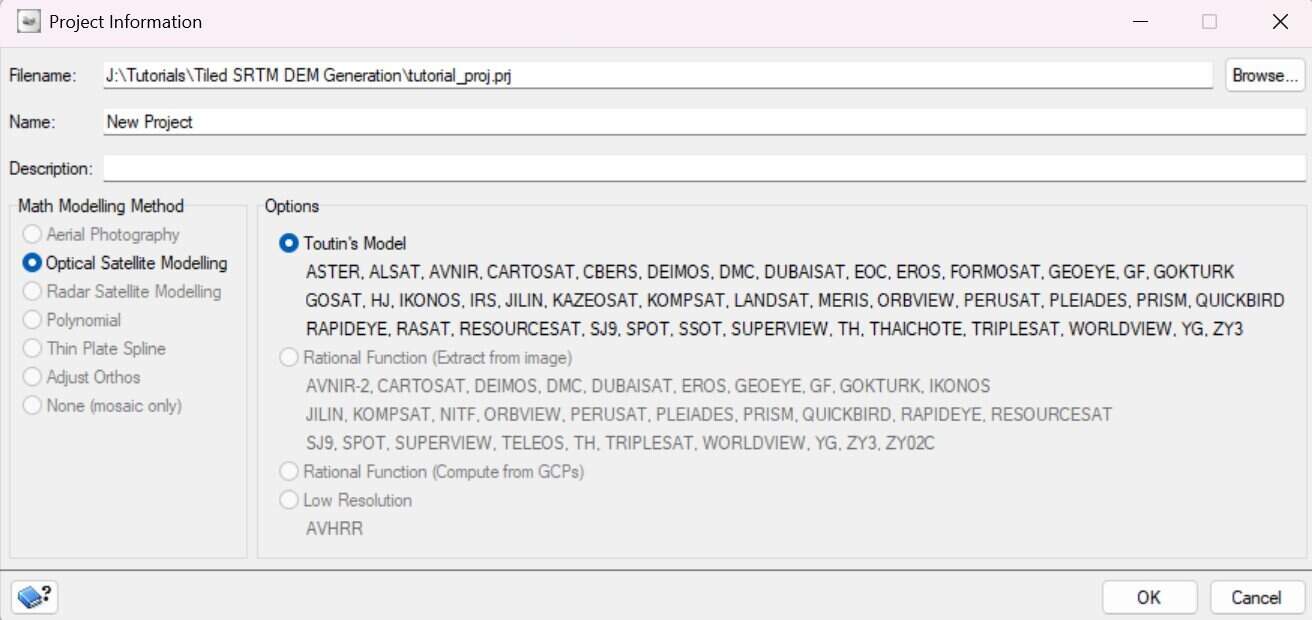
- Give your project a Filename, Name (optional) and Description (optional).
- Select the Optical Satellite Modelling in the Math Modelling Method section.
- Select Toutin's Model in the Options section.
- Click OK.
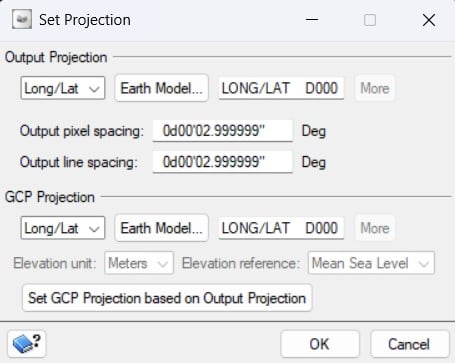
- In the Project Processing Step, select the Set Output and GCP Projection button.
- Input the appropriate projection information for your project.
3. Importing the SRTM DEM Tiles
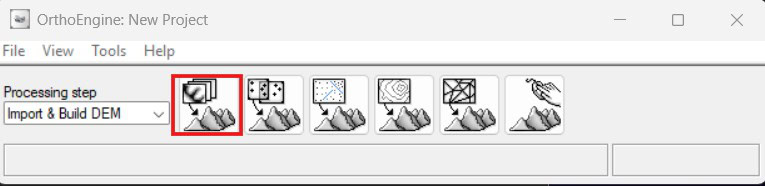
- Change the Processing Step to Import & Build DEM.
- Click on DEM from raster file.
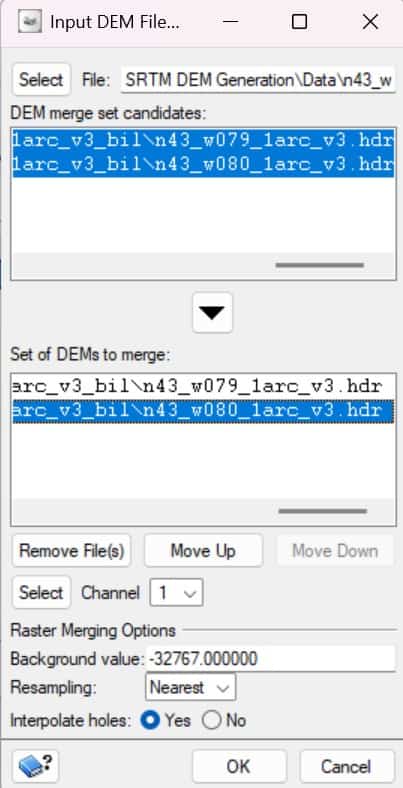
- In the File field, enter the path to the raster file(s) or click Select to select the file(s).
- To select more than one file, type the path with a wildcard character in the file name. For example, C:\PCI CATALYST\demo\*.pix
- In the DEM merge set candidates section, select the files of your choice and click the arrow.
- This moves the files to the Set of DEMs to merge section.
- In the Set of DEMs to merge section, click Move Up or Move Down as required to organize the files. When a raster from the bottom of the list overlaps a raster from the top of the list, the bottom raster will overwrite the top raster where the two overlap.
- In the Channel dropdown, select the channel you want to use or click Select.
- In the Background Value field, enter the value representing the "No Data" pixels in the DEM. You can find this information in the raster metadata.
- Select the Resampling method of your choice.
- In the Interpolate Holes, you can click Yes to automatically interpolate data between the raster DEMs. This is recommended for small gaps but not for large areas.
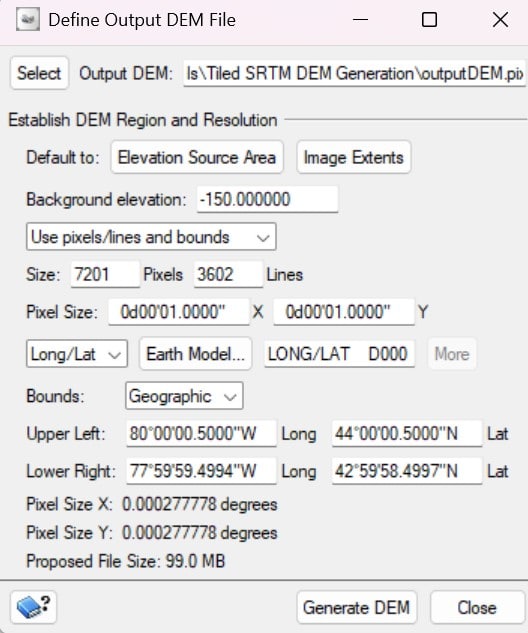
- Click OK. The Define Output DEM File window opens.
4. Generating the DEM
- In the Output DEM field, specify the name of the resulting DEM.
- Click Generate DEM