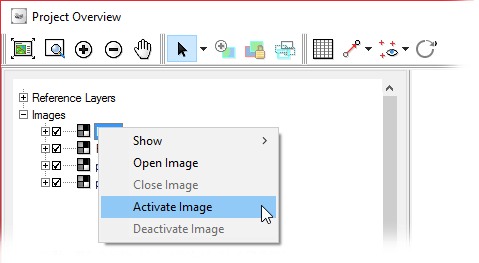
In the the Project Overview window, you can activate and deactivate one or more images in your project.
By default, each image in your project is active. An active image is included in any processing you want to do on your project. When you deactivate an image, it is still in your project, but is excluded from processing. At any time—except while a process is running—you can activate an inactive image, which makes it available to include in processing.
The Project Overview window displays both active and inactive images in your project. The footprint of an inactive image appears dimmed. That is, the footprint of an active image appears outlined according to whether it is the current one, selected, or unselected: yellow for the current image, cyan for a selected image, and black for an unselected image. The name of a deactivated image (image ID) also appears dimmed in the leftmost pane of the window.

- In the leftmost pane of the Project Overview window, right-click the image you want to deactivate, and then click Deactivate Image.

When you deactivate an image, the color of the footprint outline changes from that displayed to appear dimmed, indicating it is excluded from processing.
- In the leftmost pane of the Project Overview window, right-click the image, and then click Activate Image.
The color of the footprint outline changes from dimmed to appear as the selected image.