This topic provides a graphical overview of using the New Project Wizard when creating a new project.
Select source images
On the Source Images page of the New Project Wizard window, you select the images you want to include in your mosaic and, if necessary, enter a NoData value for the source images.
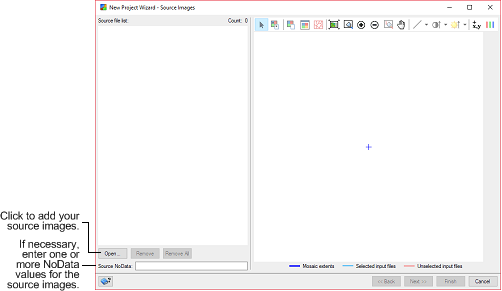
When you click Open, the File Selector window appears, in which you select the source images you want.

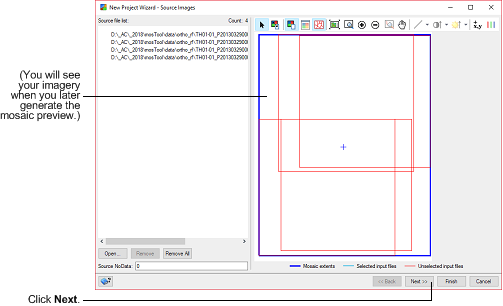
After you select the source images you want, they appear in the Source file list box.
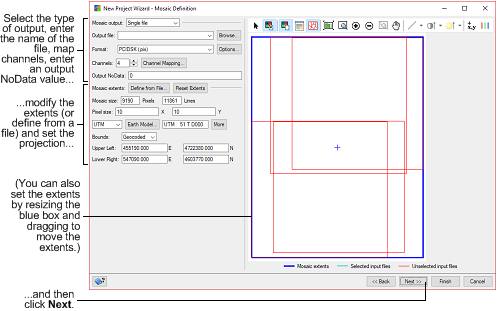
Defining the output mosaic
Your next step, on the Mosaic Definition page, is to define the output mosaic.
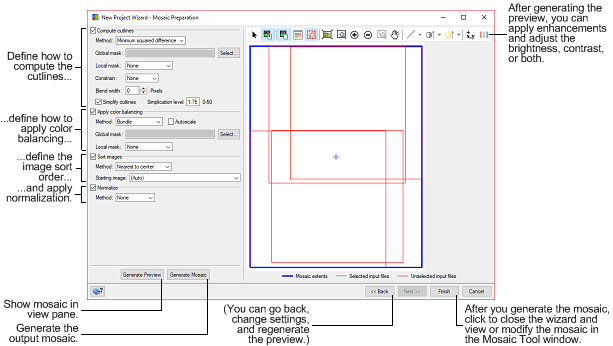
Preparing the mosaic
After you define the mosaic, your next step, on the Mosaic Preparation page, is to set up how to prepare the mosaic. You can then select to generate the mosaic preview, generate the mosaic, or both. Alternatively, you can skip creating the preview, the mosaic, or both and do so manually in the Mosaic Tool window.